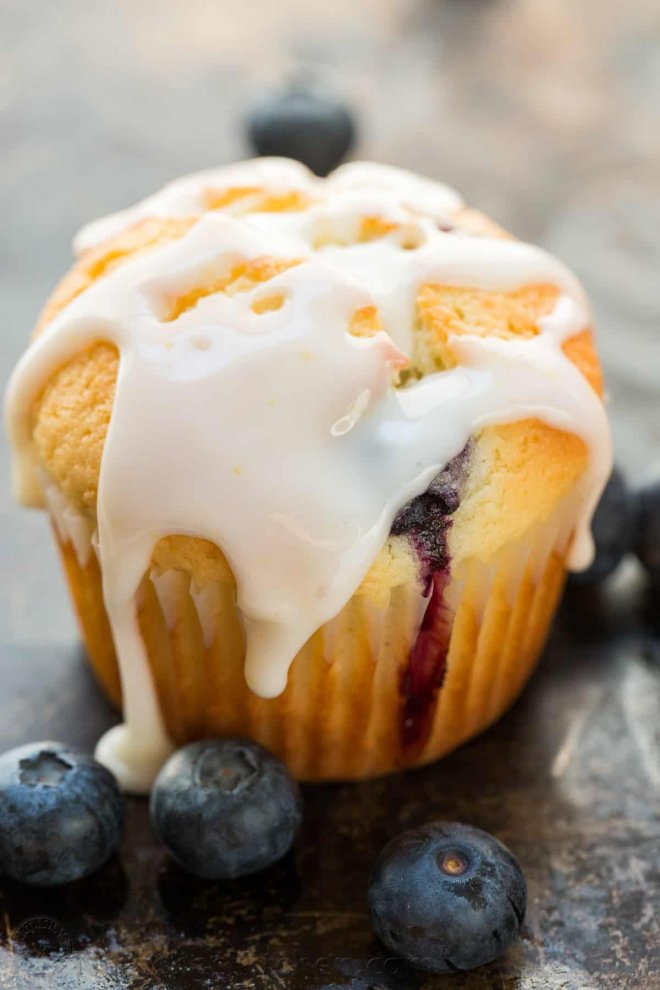
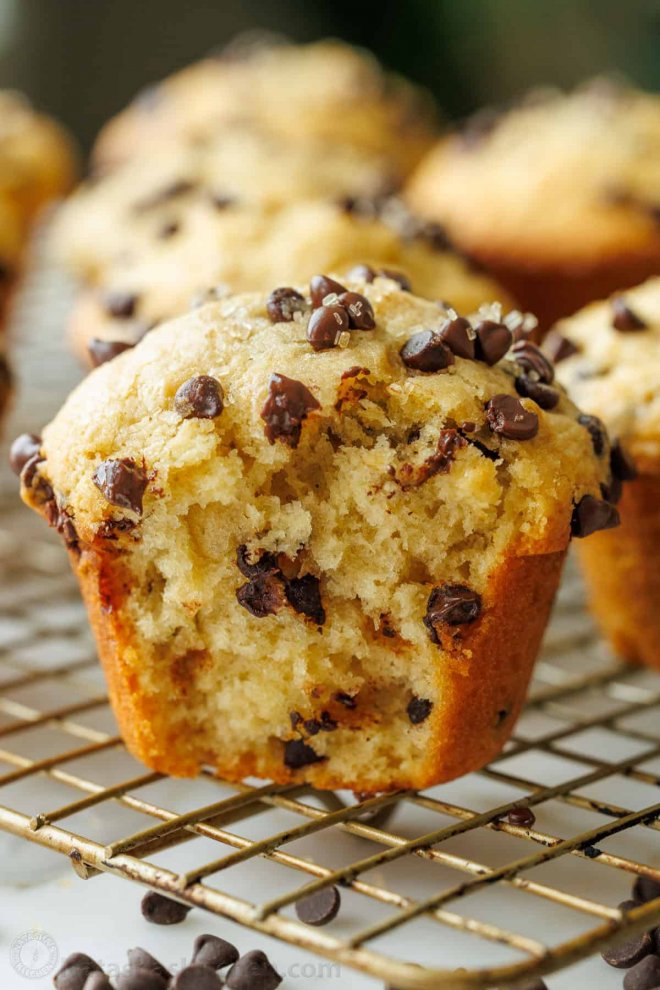
Chocolate Chip Muffins (Bakery Style)
Big, tall, and impressive bakery-style Chocolate Chip Muffins get that perfect domed muffin top rise in the oven every time. They have a soft and moist crumb and are studded with gooey chocolate morsels. They are perfection!
![]() This post may contain affiliate links. Read my disclosure policy.
This post may contain affiliate links. Read my disclosure policy.
Chocolate Chip Muffin RecipeWhen my daughter returned from visiting a friend, she couldn’t stop raving about the incredible muffins she had tried. She was completely smitten, so naturally, I reached out to her friend’s mom for the recipe. I wasted no time and baked them the very next day! The original recipe came from Mimi of Eats Delightful, and with a few small tweaks, it was love at first bite.
These chocolate chip muffins keep well and taste just as good slightly warmed up—I kept one for four days just to test the reheat, and it was wonderful. They never got dry or stiff. I also love that they aren’t overly sweet. Pour yourself a cup of coffee (or tea), curl up with a warm muffin, and enjoy a supremely cozy moment.
I love muffins—they’re basically a delicious excuse to have dessert for breakfast! You can keep them sweet, like my Cinnamon Muffins (literally, they taste just like a Churro!) or fill them with fruit like my Banana Muffins or Berry Muffins. Seriously, if you’re a true muffin lover, these Chocolate Chip Muffins are a must try!
![]() Ingredients for Chocolate Chip Muffins
Ingredients for Chocolate Chip MuffinsAll-purpose flour – Measured correctly, it provides structure for the muffins. Baking powder and baking soda – These leavening agents create those beautiful domed muffin tops. Buttermilk – Adds moisture for a tender texture and activates the baking soda for a better rise. See the notes section of the recipe card for easy buttermilk swaps. Eggs – Use room-temperature eggs to keep the batter smooth and well-mixed. Cold eggs can make the batter thicker and stiffer, which may affect how well the muffins rise in the oven. Sugars – Granulated sugar and light brown sugar add the perfect touch of sweetness while also helping the muffins develop golden, caramelized edges. For that bakery-style finish, sprinkle a bit of coarse sugar, like turbinado, on top to create a deliciously crisp, sweet crust. Vanilla extract – I like to use my homemade Vanilla Extract but storeought is fine. Chocolate Chips – I used semisweet mini chocolate chips, but you can use milk chocolate chips or chocolate chunks. To really showcase the chocolate chips, I reserve 2 Tbsp to sprinkle on top—this way, every bite has a little extra chocolatey goodness!![]() How to Make Chocolate Chip Muffins
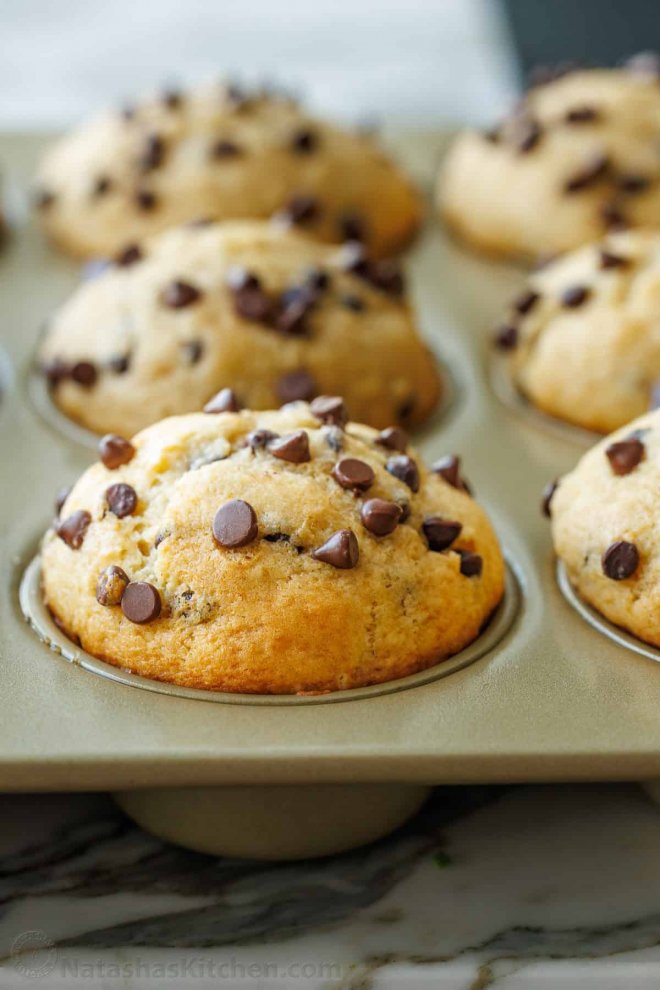
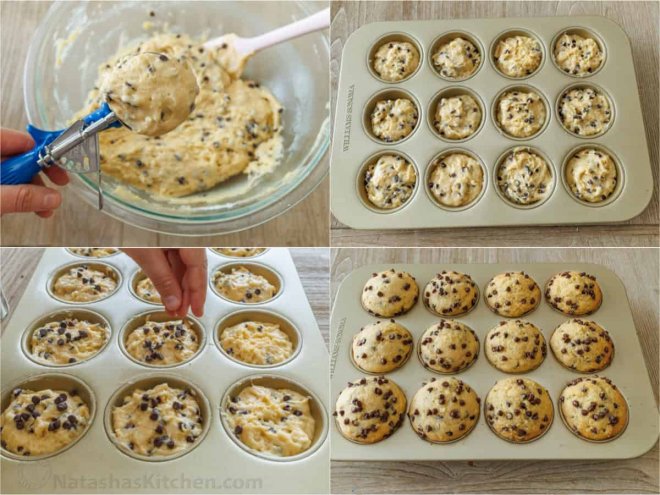
How to Make Chocolate Chip Muffins Prepare – Preheat your oven to 425°F. Line a 12-count muffin tin with paper muffin liners and set aside (p.s. parchment liners are my favorite – the muffin doesn’t stick to them). Whisk Dry Ingredients – In a medium bowl, whisk together the flour, baking powder, baking soda, and salt. Combine Wet Ingredients, Butter, and Sugars – In a separate large bowl, whisk together the buttermilk, eggs, granulated sugar, brown sugar, melted butter, and vanilla until well combined. Mix Wet and Dry Ingredients – Add the dry ingredients to the wet ingredients and stir until there are no visible streaks of flour. Don’t over-mix the batter, or your muffin will turn out dense. Stir just until the ingredients are combined – it should be lumpy. Fold in Chocolate Chips – Gently fold in the chocolate chips, reserving 2 tablespoons to sprinkle on top if desired.![]()
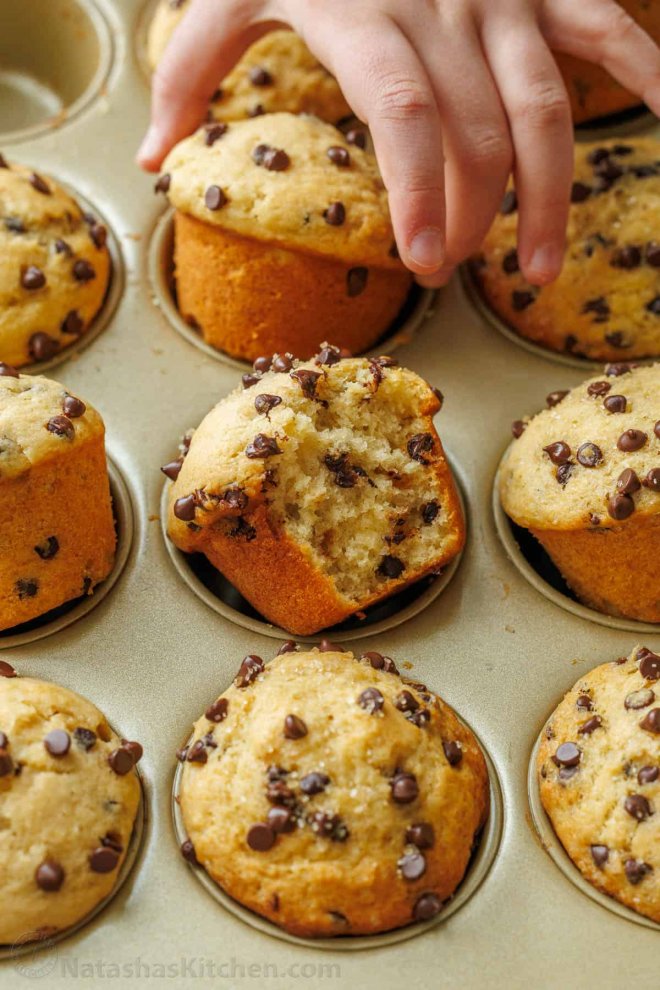
Portion and Add Toppings – Scoop the batter into the muffin tin, filling each cup to the top (a trigger-release ice cream scoop makes portioning easy). Sprinkle the remaining chocolate chips on top and finish with a generous sprinkle of coarse sugar if desired. Bake the Muffins – Bake at 425°F for 5 minutes, then lower the heat to 350°F and bake for another 15-17 minutes, or until the muffin tops are golden and a toothpick inserted into the center comes out clean. Allow the muffins to cool in the pan for 10 minutes before transferring them to a wire rack to cool completely. Enjoy your bakery style muffins while they’re warm- so good! Pro Tip:Use a cookie scoop to add the batter to each muffin liner. This ensures even portions in each cup, allowing them to bake evenly and be uniform in size.
![]() Natasha’s Pro Tip: An easy way to make these Chocolate Chip Muffins look as good as the ones in a bakery display is to reserve two tablespoons of chocolate chips for the top before baking. Add a sprinkle of coarse sugar, and everyone will think you picked these beauties up from the local bakery.
Natasha’s Pro Tip: An easy way to make these Chocolate Chip Muffins look as good as the ones in a bakery display is to reserve two tablespoons of chocolate chips for the top before baking. Add a sprinkle of coarse sugar, and everyone will think you picked these beauties up from the local bakery.
Tips For Baking Perfect Muffins Every TimeStart at Higher Heat – For tall, bakery-style muffin tops, start by baking at 425°F for 5 minutes, then lower the temperature to 350°F for the rest of the bake time. The initial burst of heat helps the muffins rise quickly, creating that domed top. Don’t Over-Bake – You will know the muffins are done when a toothpick inserted into the middle of the muffin comes out clean. If you still see batter on the toothpick, pop the muffins back into the oven to bake for a few more minutes and check again.![]() Storing and Reheating MuffinsHaving freshly baked muffins on hand is a game-changer. Grab one for a quick snack on the go, pack one in a lunchbox for a mid-day treat, or pull some from the freezer when a crowd of hungry teens shows up unexpectedly.
Storing and Reheating MuffinsHaving freshly baked muffins on hand is a game-changer. Grab one for a quick snack on the go, pack one in a lunchbox for a mid-day treat, or pull some from the freezer when a crowd of hungry teens shows up unexpectedly.
To Store: Allow the muffins to cool completely to room temperature, then transfer to an airtight container and store for up to 3 days. Refrigerating muffins is not recommended since they can get dry and tough. Freezing: Wrap muffins individually in plastic wrap, then transfer to a freezer-safe zip bag or container and freeze for up to 3 months. To Thaw/ Reheat: Unwrap and thaw at room temperature for about 30 minutes, then pop it in the microwave for about 20-30 seconds to warm it up. ![]() Sure, you could buy store-bought muffins, but why bother when you can enjoy fresh-baked ones for days? (Hint: Double the recipe and freeze a batch—you’ll thank me later…)
Sure, you could buy store-bought muffins, but why bother when you can enjoy fresh-baked ones for days? (Hint: Double the recipe and freeze a batch—you’ll thank me later…)
 This post may contain affiliate links. Read my disclosure policy.
Chocolate Chip Muffin RecipeWhen my daughter returned from visiting a friend, she couldn’t stop raving about the incredible muffins she had tried. She was completely smitten, so naturally, I reached out to her friend’s mom for the recipe. I wasted no time and baked them the very next day! The original recipe came from Mimi of Eats Delightful, and with a few small tweaks, it was love at first bite.
These chocolate chip muffins keep well and taste just as good slightly warmed up—I kept one for four days just to test the reheat, and it was wonderful. They never got dry or stiff. I also love that they aren’t overly sweet. Pour yourself a cup of coffee (or tea), curl up with a warm muffin, and enjoy a supremely cozy moment.
I love muffins—they’re basically a delicious excuse to have dessert for breakfast! You can keep them sweet, like my Cinnamon Muffins (literally, they taste just like a Churro!) or fill them with fruit like my Banana Muffins or Berry Muffins. Seriously, if you’re a true muffin lover, these Chocolate Chip Muffins are a must try!
 Ingredients for Chocolate Chip Muffins
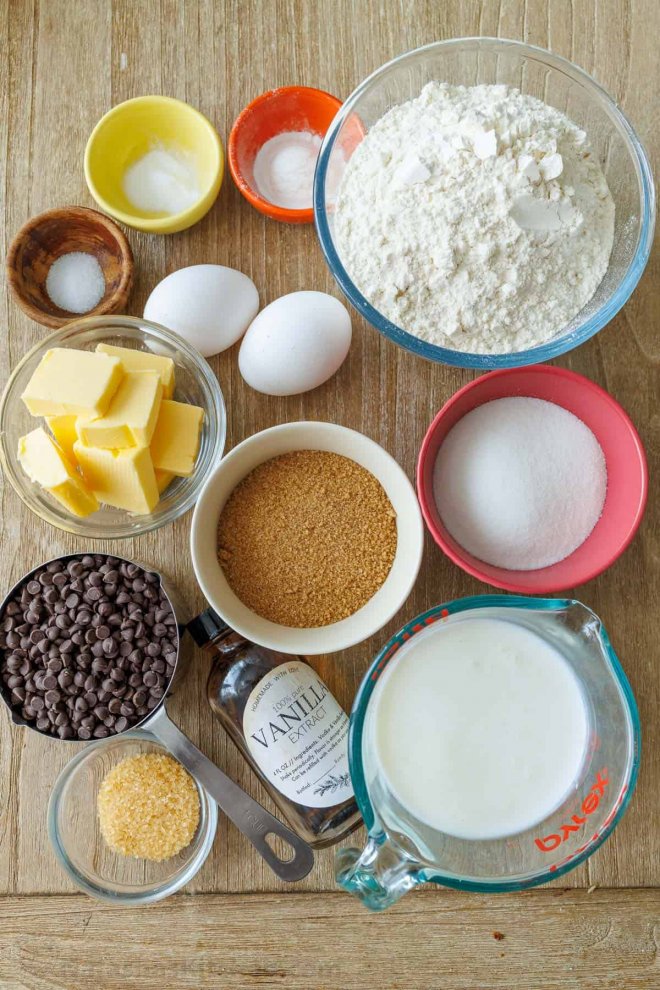 How to Make Chocolate Chip Muffins
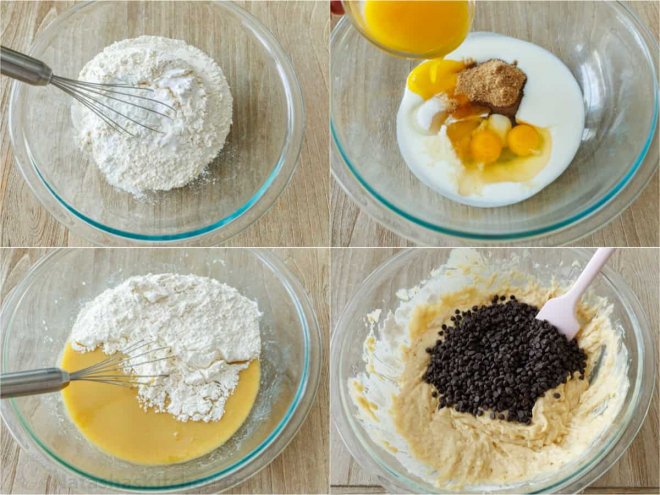
 Natasha’s Pro Tip: An easy way to make these Chocolate Chip Muffins look as good as the ones in a bakery display is to reserve two tablespoons of chocolate chips for the top before baking. Add a sprinkle of coarse sugar, and everyone will think you picked these beauties up from the local bakery.
Tips For Baking Perfect Muffins Every Time
 Storing and Reheating MuffinsHaving freshly baked muffins on hand is a game-changer. Grab one for a quick snack on the go, pack one in a lunchbox for a mid-day treat, or pull some from the freezer when a crowd of hungry teens shows up unexpectedly.
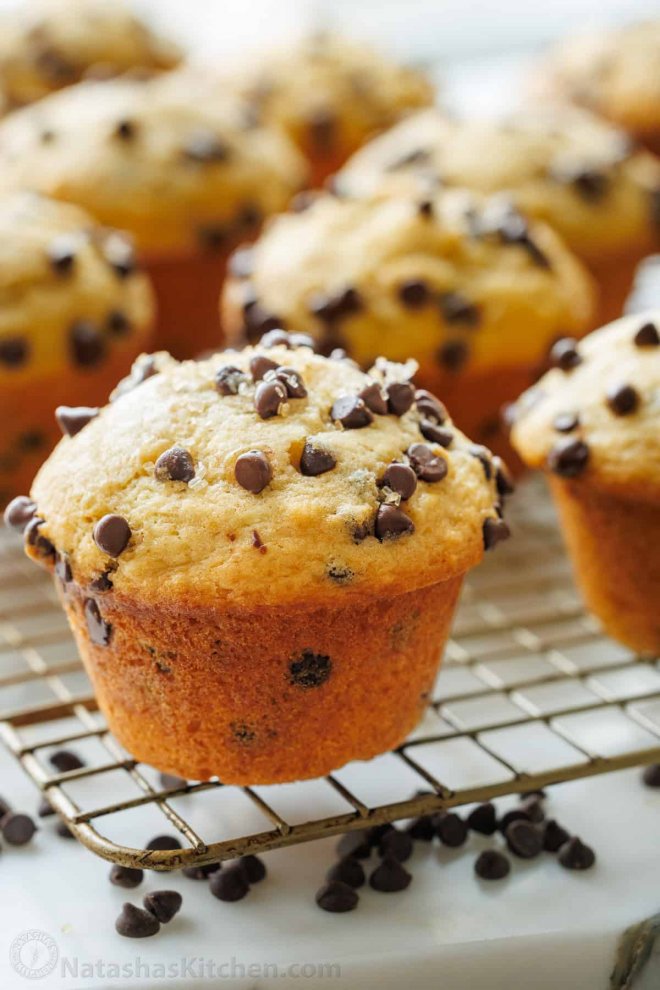 Sure, you could buy store-bought muffins, but why bother when you can enjoy fresh-baked ones for days? (Hint: Double the recipe and freeze a batch—you’ll thank me later…)